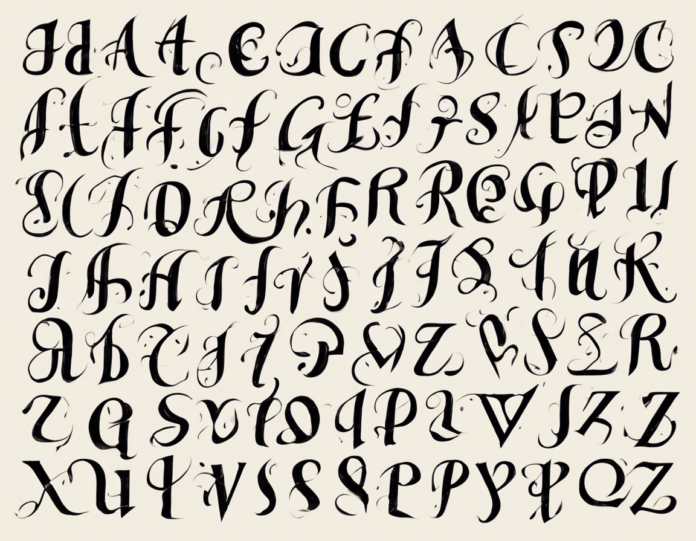
Calligraphy is a beautiful art form that has been practiced for centuries. From ancient manuscripts to modern wedding invitations, calligraphy adds a touch of elegance and sophistication to any piece of writing. Whether you are a complete beginner or looking to refine your skills, mastering the calligraphy alphabet is the first step to becoming a proficient calligrapher. In this comprehensive guide, we will explore the intricacies of the calligraphy alphabet from A to Z, providing you with all the tools and knowledge you need to create stunning calligraphic pieces.
Understanding the Basics of Calligraphy
Before delving into the specifics of the calligraphy alphabet, it is essential to understand the basic principles of calligraphy. Calligraphy is not just about writing letters; it is about creating art with every stroke of the pen. Here are some fundamental concepts to keep in mind:
Tools of the Trade
- Nib: The nib is the metal tip of the calligraphy pen that comes in various sizes and shapes.
- Ink: Use high-quality ink that flows smoothly and does not bleed on the paper.
- Paper: Choose a smooth, high-quality paper that is suitable for calligraphy.
Fundamental Strokes
- Downstroke: A thick, heavy line created by applying pressure on the nib.
- Upstroke: A thin, light line created by lifting the pen off the paper.
- Loop: A circular stroke often found in letters like “e” and “g.”
Letter Spacing and Sizing
- Consistency: Maintain consistent spacing between letters to ensure a harmonious look.
- Proportions: Pay attention to the proportions of each letter to create a balanced and visually appealing composition.
The Calligraphy Alphabet: A to Z
Now, let’s explore each letter of the alphabet in calligraphy, along with tips on how to master their respective forms and strokes.
A
- Uppercase A: Start with a slightly slanted downstroke from the top to the baseline. Add a thin upstroke on the left side.
- Lowercase a: Begin with a short upstroke, followed by a round curve connecting to the baseline.
B
- Uppercase B: Create a symmetrical shape by starting with a round curve at the top, followed by a straight downstroke.
- Lowercase b: Begin with a small loop at the top, extending into a straight downstroke.
C
- Uppercase C: Form a smooth, rounded curve from the top to the baseline.
- Lowercase c: Similarly, create a round curve connecting the top and baseline.
D
- Uppercase D: Start with a round curve at the top, followed by a straight downstroke with a slight curve at the end.
- Lowercase d: Begin with a loop at the top, extending into a straight downstroke with a small curve.
E
- Uppercase E: Begin with a horizontal line at the top, followed by a slanted downstroke to the baseline.
- Lowercase e: Create a small loop at the top, extending into a diagonal downstroke.
F
- Uppercase F: Start with a horizontal line at the top, followed by a straight downstroke slightly to the right.
- Lowercase f: Begin with a small loop at the top, extending into a straight downstroke.
G
- Uppercase G: Form a round curve at the top, followed by a curved downstroke.
- Lowercase g: Begin with a loop at the top, extending into a curved downstroke with a loop.
H
- Uppercase H: Start with two vertical parallel lines, connected at the top and bottom with a horizontal crossbar.
- Lowercase h: Create a straight downstroke, followed by a small loop at the top.
I
- Uppercase I: Begin with a straight vertical line.
- Lowercase i: Similarly, create a short vertical line.
J
- Uppercase J: Start with a circular shape at the top, followed by a straight downstroke.
- Lowercase j: Create a small loop at the top, extending into a straight downstroke.
K
- Uppercase K: Begin with a slanted downstroke to the baseline, followed by a diagonal line extending from the middle.
- Lowercase k: Create a small loop at the top, followed by a slanted downstroke.
L
- Uppercase L: Start with a straight vertical line.
- Lowercase l: Similarly, create a short vertical line.
M
- Uppercase M: Form three vertical lines connected at the bottom, with V-shaped arches.
- Lowercase m: Create three curved lines connected at the bottom, resembling the uppercase M.
N
- Uppercase N: Start with two diagonal lines converging at the bottom.
- Lowercase n: Similarly, create two diagonal lines.
O
- Uppercase O: Form a smooth, rounded shape.
- Lowercase o: Similarly, create a round shape.
P
- Uppercase P: Create a round shape at the top, followed by a straight downstroke.
- Lowercase p: Form a small loop at the top, extending into a straight downstroke.
Q
- Uppercase Q: Start with a round shape, followed by a curved line extending below the baseline.
- Lowercase q: Begin with a loop at the top, extending into a curved line below the baseline.
R
- Uppercase R: Begin with a round shape at the top, followed by a diagonal downstroke connected to the baseline.
- Lowercase r: Create a small loop at the top, extending into a diagonal downstroke.
S
- Uppercase S: Form two curved lines intersecting at the middle.
- Lowercase s: Similarly, create two curved lines.
T
- Uppercase T: Start with a horizontal line at the top, followed by a vertical line through the center.
- Lowercase t: Form a horizontal line at the top, extending into a straight downstroke.
U
- Uppercase U: Create a rounded shape connected at the top and bottom.
- Lowercase u: Similarly, form a rounded shape.
V
- Uppercase V: Begin with a diagonal downstroke to the baseline, followed by a diagonal upstroke.
- Lowercase v: Create a small triangular shape.
W
- Uppercase W: Form two V-shaped arches connected at the bottom.
- Lowercase w: Similarly, create two V-shaped arches.
X
- Uppercase X: Begin with a diagonal line from top left to bottom right, followed by the opposite diagonal line.
- Lowercase x: Create two diagonal intersecting lines.
Y
- Uppercase Y: Start with a diagonal downstroke to the baseline, followed by a diagonal upstroke diverging to the right.
- Lowercase y: Similarly, create a diagonal downstroke, followed by a shorter upstroke.
Z
- Uppercase Z: Begin with a horizontal line at the top, followed by a diagonal line to the right and a final horizontal line.
- Lowercase z: Form a horizontal line at the top, followed by a diagonal line to the right.
Tips for Mastering the Calligraphy Alphabet
- Practice consistently to improve your letter forms and strokes.
- Experiment with different nib sizes and writing angles to find your preferred style.
- Study calligraphy fonts and scripts for inspiration and guidance.
- Take breaks during practice to avoid hand fatigue and maintain focus.
- Join calligraphy workshops or online communities to learn from fellow enthusiasts.
Frequently Asked Questions (FAQs)
Q1: Do I need expensive calligraphy tools to start practicing?
A1: While high-quality tools can enhance your calligraphy experience, you can begin practicing with basic supplies such as a beginner’s calligraphy pen, ink, and paper.
Q2: How long does it take to master calligraphy?
A2: Mastery of calligraphy varies for each individual. Consistent practice and dedication can lead to significant improvement over time.
Q3: Are there different styles of calligraphy alphabets?
A3: Yes, there are various calligraphy scripts and styles, such as Gothic, Italic, and Copperplate, each with unique characteristics and letter forms.
Q4: How can I determine the right nib size for my calligraphy projects?
A4: Experiment with different nib sizes to see which one complements your writing style and desired letter size. Fine nibs are ideal for intricate details, while broader nibs create bolder strokes.
Q5: Can I use calligraphy for modern projects like digital designs?
A5: Yes, calligraphy can enhance digital designs such as logos, social media graphics, or website elements. You can create calligraphy pieces digitally using specialized tools or by scanning handmade artwork.
In conclusion, mastering the calligraphy alphabet requires patience, practice, and a keen eye for detail. By understanding the nuances of each letter and honing your skills through consistent practice, you can elevate your calligraphy abilities and create stunning pieces of art. Embrace the beauty of calligraphy as you explore the endless possibilities of this timeless art form.


